Planning a concrete paving project
-
Prepare the site
Decide on the area to be concreted. Draw up a plan and write in all measurements. Peg out the site, and stretch cord line supported on the pegs to define the area. Now remove all turf and vegetable matter.
-
Check foundations

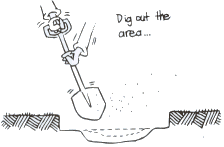
Silt or soils with a lot of organic matter make poor foundations. Dig out where necessary and refill.
-
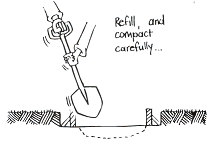
Compact foundations
Foundations should always be firm and even.
-
Levels and drainage
Determine the finished levels of the work: write them on the plan. Check on drainage required - allow a minimum slope of 20 mm per metre (where drainage is necessary): indicate this on the plan.
Ensure that water will not run:
- towards house footings
- into garage or carport
- into neighbour's property.
-
Determine the thickness

Determine thickness (depth) of concrete, and write it on the plan. For example, a depth of 100 mm is normal for driveways, carports and garages used by passenger vehicles but not for trucks.
-
Volume
Calculate the volume of concrete required.
-
Formwork
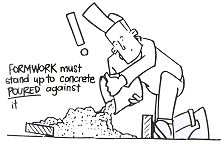
Concrete must be contained by formwork placed along the edges of the area to be formed. Timber boards are generally used and should be properly braced so that the formwork is sufficiently strong to support the weight of the concrete. Joints between boards should be watertight to prevent leakage of cement slurry. Allow for drainage and any other requirements shown on the plan and make sure that the ground is firm and even, particularly under the formboards. Spread a 10mm layer of sand or fine gravel over the entire area to level it and act as a slip joint between the ground and the concrete.
-
Finish
Decide on the surface finish - remember that a steel floated trowelled finish produces a smooth surface and is best used internally, externally a wood float or broomed finish is advised.
-
Labour
Assess labour requirements: how many able-bodied helpers will be needed? Determine the delivery time of the concrete to the site. Will a concrete pump be required? Talk to us about the recommended grade of concrete for the particular application, and the maximum time trucks can stay and discharge the concrete. If the allocated time is exceeded, a surcharge may be incurred.
-
Equipment
Assess equipment requirements. Basic tools include shovels or spades, screed board, float, edging tool, jointing tool, wheelbarrows and either plastic sheet or proprietary compound to cure the concrete after it is placed and finished.
-
Volume per day
Ensure that the volume of concrete required to cover the area to be concreted can be handled by the assembled team of workers in one day. If not, form a joint by placing a form board to ensure that concreting stops at a formed vertical face.
-
Vapour barrier
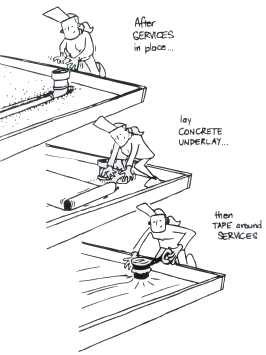
Under a floor slab for a garage, house or covered patio and whenever the floor slab is to be enclosed and have floor coverings, you should install a suitable vapour barrier (plastic sheet) on the ground. The vapour barrier should be overlapped a minimum of 200 mm each time it is joined together, then securely taped to prevent separation. The vapour barrier should also be taped around services such as drainage pipes. Vapour barrier material can be purchased from most builders' supply outlets and major hardware retailers.
-
Reinforcement
Decide on reinforcement requirements and/or the position of control joints: write it on the plan. Remember, when using reinforcement, it is generally discontinued at the joints to provide crack control. Place reinforcement correctly on bar chair supports. Determine the extent of the work - refer to the plan and pegged out site and ensure that all aspects of the work have been considered. It may be worthwhile, and will cost very little, to form a 1m x 1m trial area to test placing, finishing and curing techniques. Furthermore, a small practice strip of unreinforced concrete can be readily removed and disposed of if the desired result is not achieved. If after this assessment of the scope of the work, the job appears too large to handle, call in a concrete contractor and use the plan to instruct them about the work required.
-
Order concrete
Congratulations, you have a plan and you're well prepared. Now to put your ideas into action!
Call VM Minimix on
03 9460 4717 to arrange prompt, friendly and professional delivery of your pre-mixed concrete. -
Construction
Place, finish and cure the concrete.
IMPORTANT
Do not add water to batched concrete as this will reduce its final strength.
Steps to Remember
- Estimate quantity: volume in m³(length x width x depth + 10%)
- Order:
- volume m³(rounded up to nearest 0.2 cubic metre)
- grade (eg N20)
- slump (eg 100mm)
- Specify:
- use (eg path, garage floor etc)
- when using a concrete pump, seek advice as to the recommended concrete grade.
IMPORTANT
If you are unsure of your estimated quantity, confirm measurements (length in metres x width in metres x depth in metres) with us when placing your order.